Have you ever considered creating art WITH your child? I love creating collaborative pieces with my little ones. Creating art together makes it that much more special. Today I am going to show you the basics for Kid’s Watercolor Art Transfer.
![]()
*This post contains affiliate links.
Let’s start with what you will need to make your collaborative transfer art:
- watercolor paint
- watercolor paint brushes of varied sizes
- watercolor paper
- plain white drawing paper
- transfer paper
- pencil
- fine black ink pen
Don’t forget CREATIVITY!
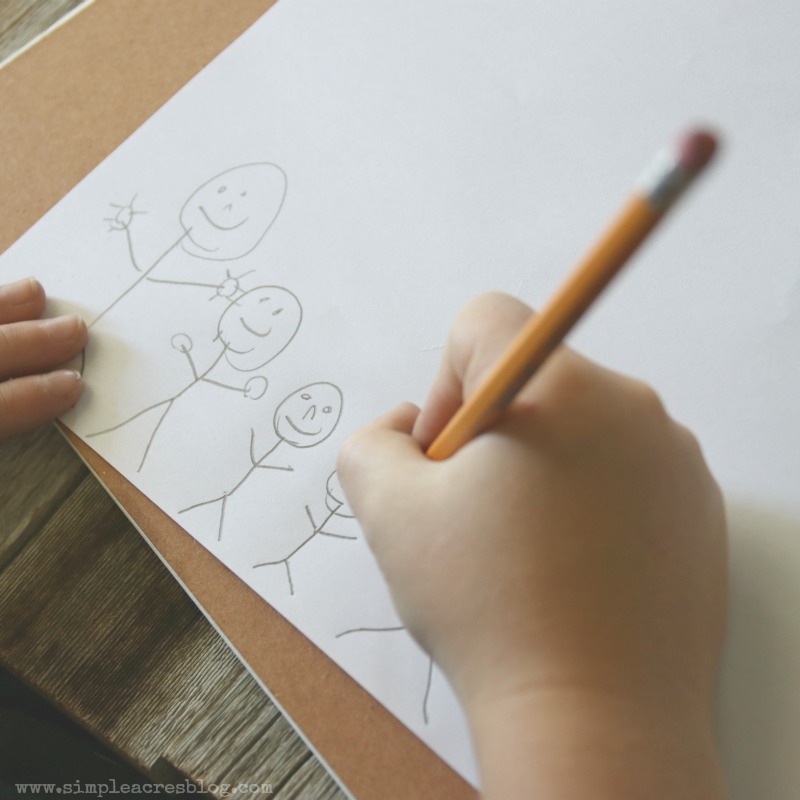
- First, encourage your child to express themselves through a simple drawing with pencil on white drawing paper.
![]()
2. Once your child is done with their drawing, place the transfer paper with the darkest black ink side down on your watercolor paper.
![]()
3. Trace your child’s picture onto the watercolor paper. When doing this what will remain is the ink from the transfer paper where you applied pressure through tracing.

4. Now you can watercolor your child’s drawing. This allows you to create a piece that is a little bit a part of each of you. (For techniques and inspiration review the posts at the bottom of the page.)

5. Lastly, use your fine black ink pen to add detail and nice line work to your Kid’s Watercolor Art Transfer.
It is so important to take those moments in life, slow down, savor your loved ones and create the life you long for! Dovidenia. Xo

If you love art and watercolors you may also love these tutorials:
If you like art you will LOVE this article on the benefits of finger painting for kids: