If you know a little bit about me, you know I love all things art! In the last few years one medium of art I have come to really enjoy is wood burning. It offers the ability to add your creativity while making something unique very affordably. Today I am sharing how you can create a wood burned appetizer tray.
This post contains affiliate links.

What I personally love about wood-burning is the method of creating the art, the smoke, the heat (as I am usually creating in the Fall and Winter months) and the slower pace and attention to detail it calls for. Wood burning is a great project you will find yourself success in due to its simplicity!
Here is what you need to create your own DIY Wood Burned Appetizer Tray:
- wood burner
- wood pre-cut unfinished appetizer tray
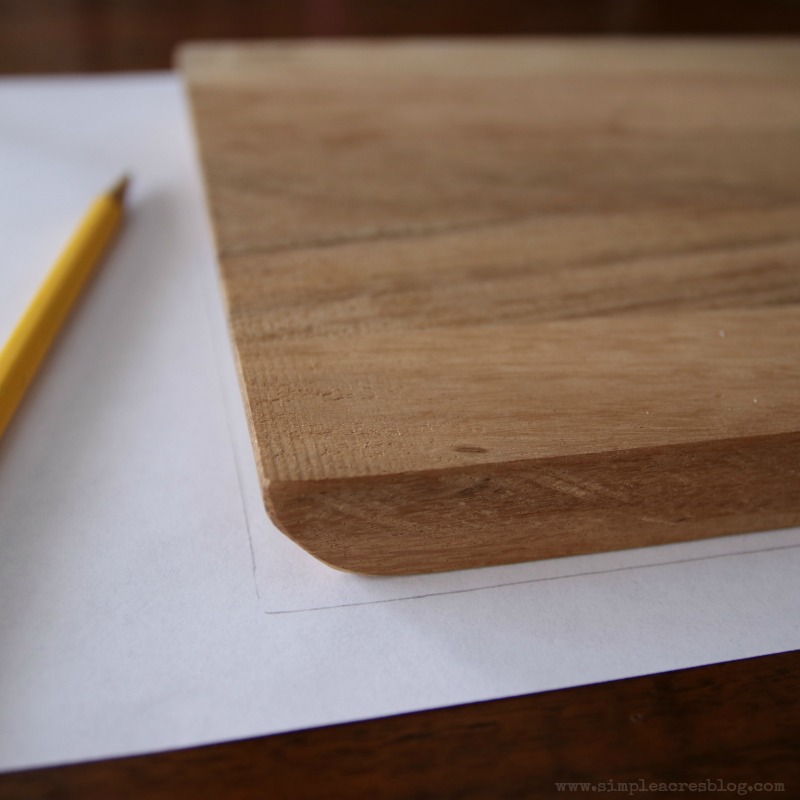
- pencil, paper and transfer paper (if you choose to hand draw your design as I did)
- hot stamps or metal stencils (if you prefer to add design without free hand drawing)
- food safe sealant
If you are going to use a drawn design, after it is drawn you can then use transfer paper placed underneath your drawing to then transfer onto your wood. This will reduce errors and eraser marks on your wood. If you are avoiding hand drawn design you can find images and trace over them with your transfer paper onto the wood or use hot stamps attached to your wood burning pen or metal stencils to create designs. Once you create your design and burn it into your wood add the wood sealant to preserve your wood (make sure food safe) then you are done.
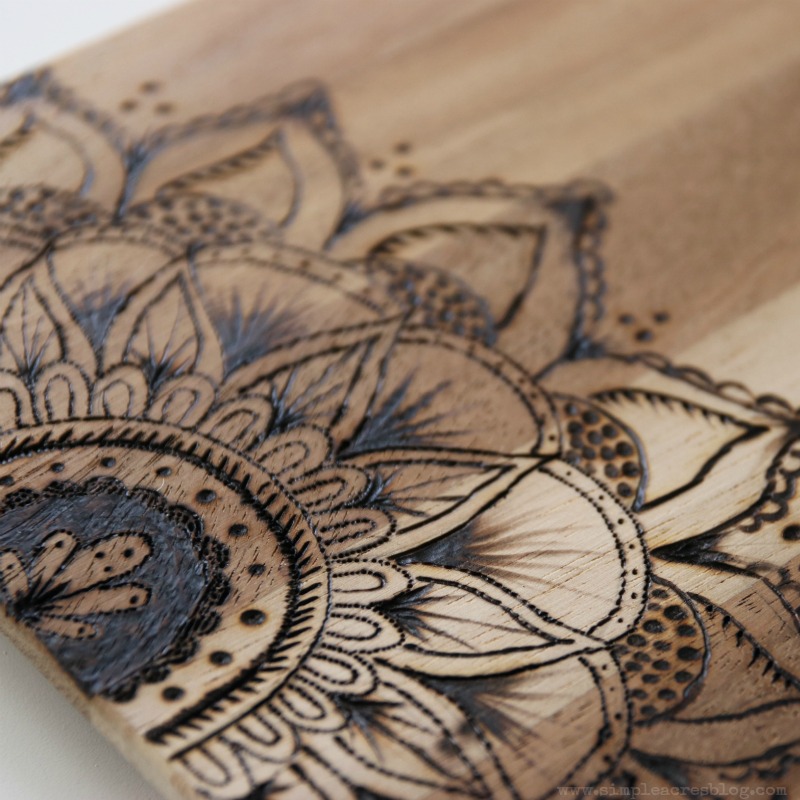
TIP: Make sure your take your time and move your burner across your wood slowly to get the nice lines you see below. The one thing I notice with my students new to this technique is they want to write as quickly as a pen would write. This speed causes uneven and spotted lines. Move your pen very slow and you will see much better line work. If you cross course ridges in your wood sometimes to create a line small dots very close together will give you the appearance of a nice line when the ridges want to pull your wood burner off track.
Here is a mandala design I created for an art class I taught locally:
In this post I was hoping to simply inspire you to begin playing around with wood burning art and experimenting. In future posts I will go into more depth of technique to creating the varied strokes I create and what tips I use to do so. Also, follow along with me at my friends AWESOME blog Moms and Crafters as I cover the materials, books and techniques in even more detail.
Follow all my art and local class options here:
I teach art classes locally but will travel to select locations. I teach DIY, wood burning projects as well as acrylic and watercolor painting classes. I also offer private creative events for birthdays, corporate events and more! If you are interested in my services inquire here or DM me on the Instagram account shared above. Dovidenia. XO
You can also shop at my Etsy shop here!


I enjoy doing embroidery work and have used the patterns on wood also for wood burning. Just place the iron on pattern on the wood and hold the iron on the pattern for a little bit. Depending on how many times the pattern has been used it turns out really well then wood burn over the lines. Quick and simple.