With a new year always comes an urge to organize and improve in my busy mind. Can you relate? I am looking forward to sharing more fun ways to simplify life with you all this year. One of my most popular topics I have shared was the one on the beginnings of my farmhouse renovation process I am in….or well, will probably ALWAYS be in due to my love of decorating. HA!
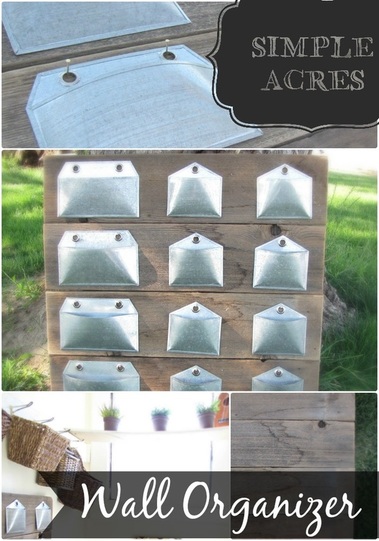
This Wall Organizer DIY is just the beginning of fun projects coming your way at Simple Acres! I use up-cycled wood in this DIY to make something that helps organize your life.
*This post includes affiliate links for your convenience. Your use of these links supports Simple Acres and the free resources provided. Thank you for your loyal readership! XO
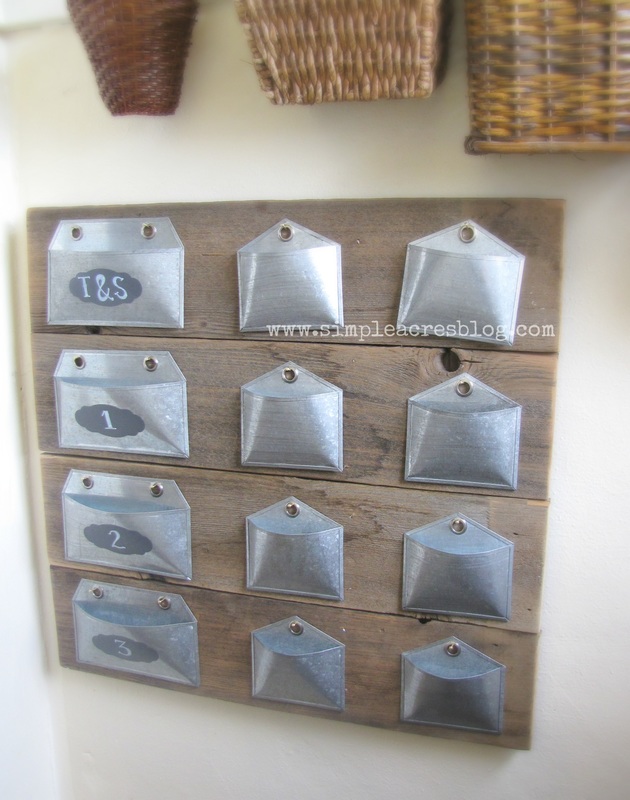
I love creativity that is thrifty! This Wall Organizer was made from old wood fencing I up-cycled into something useful…and might I add cute!
 You will need:
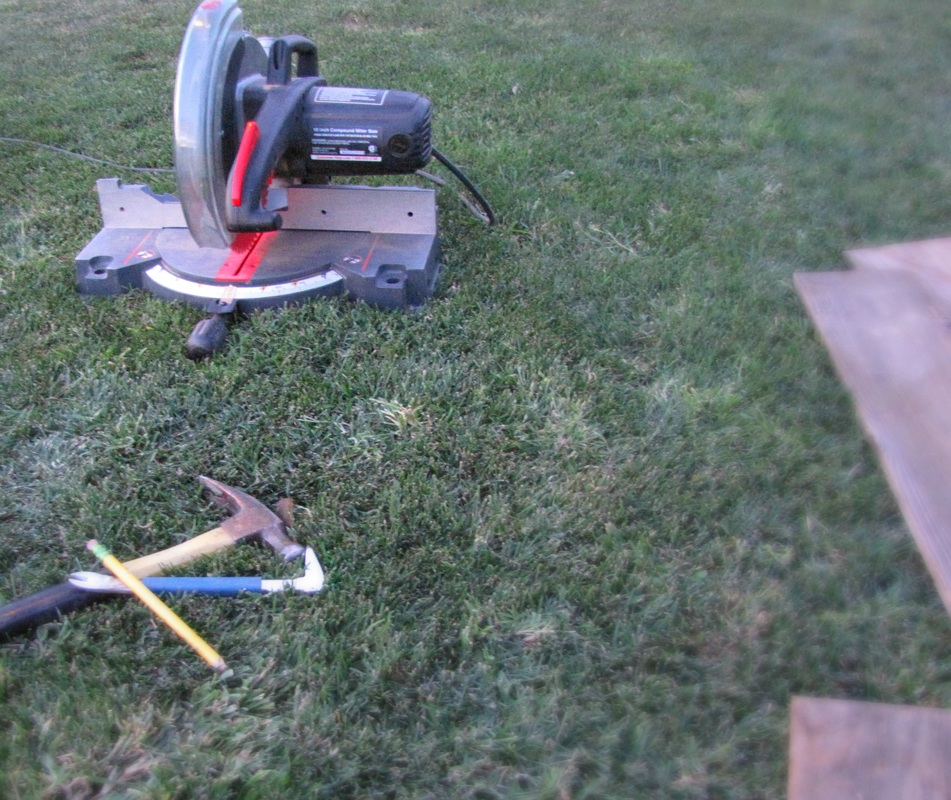
a saw of some sort (I’m still learning my tools…Ha!)
hammer
nails
pencil
tape measure
hand sander
wood
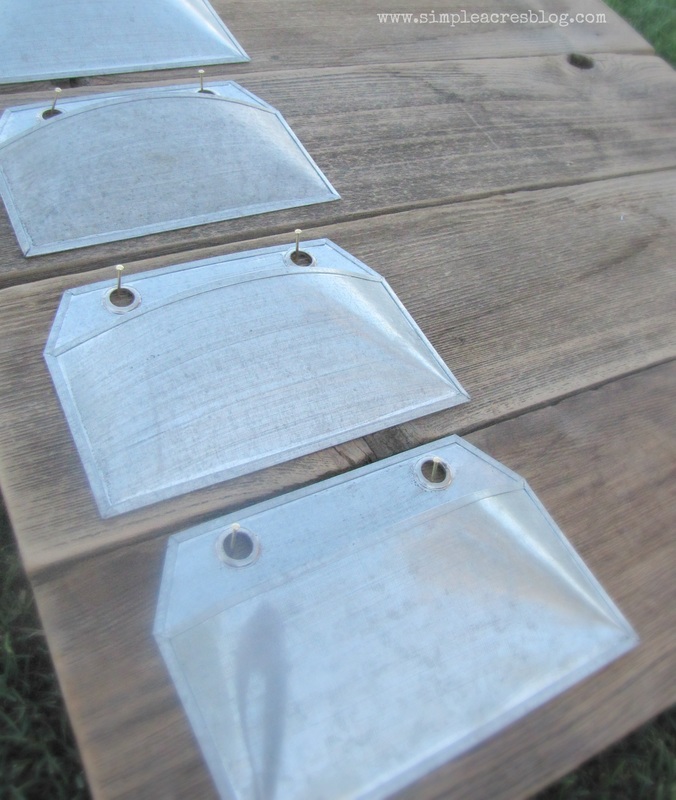
metal letter holders (amount per your need, I used 12)
Instructions
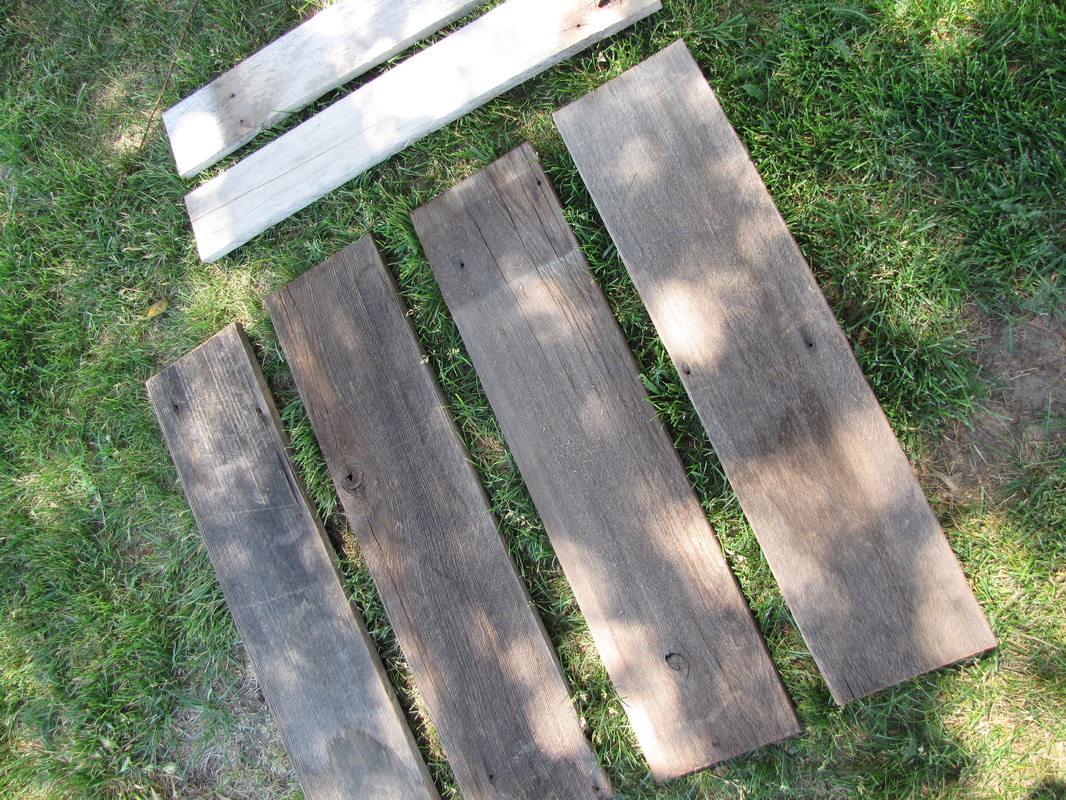
- Determine the size you would like your organizer to be, mine was nearly 24″x 24″…or so.
- Cut your boards accordingly to the size you are looking for.
- Cut two back boards that will be nailed in the back to keep your piece together.
- On a flat surface I lay my main boards down and press them together as I would like.
- Use the back boards to brace the whole piece together by nailing all along these boards.
- These back boards are positioned in the opposite direction of your main boards you are creating the organizer with.
- Once everything is firmly nailed and attached from the back, use a hand sander to sand the front surface and all the edges for a more finished look and softer feel.
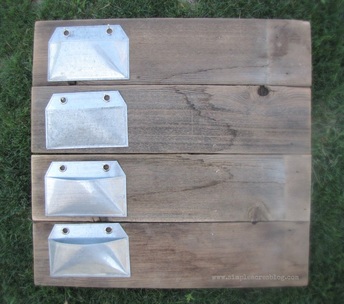
- Measure about 1/2″ to 1″ from the top and the same measurement from the side and mark your placements with a pencil.
- Place nails where needed to attach your metal envelopes (I attached a link to a similar type envelope with a chalkboard finish in this post for your convenience. If you can not find a metal envelope with preset holes as I have, you could also Velcro that is created for hanging pictures and place it on the wood and the back of the envelope for a non permanent attachment. I have been using this Velcro lately and loving its versatility and strength.)
- Once your first row is measured and attached its very simple to add the rest of your envelopes with the spacing you prefer…I am a bit of an “eye-baller” myself….I drive the hubs CRAZY with that.
- For hanging I purchased a wall picture hanger kit and used the fasteners that best suited me as there are several options (link attached in post). I used the wire and the metal eyelets you can screw in to the back of your wood just by hand.
There you have it! A Wall Organizer you can use to place receipts, important notes to other family members, favorite recipes….the options are endless and you truly can remake this to your own needs and style preference! I hope you enjoyed this simple inspiration from a person who knows how to build stuff but needs to learn the names of her tools better! Ha! Dovidenia my sweet friends!PS- This is an item I can make upon request depending on where you are located (due to shipping). For inquiries and requests contact me here. I can also be found on Etsy where you will find a mish-mash of my random arts and inspirations. If you liked this post you may also like more creative inspiration here and here.


Trackbacks/Pingbacks